A blue mug can distract from a portrait you otherwise like. If you ask ChatGPT to “clean this up,” it might remove the mug, change the wall or retouch the face. Name the change, then name the details you want to keep.
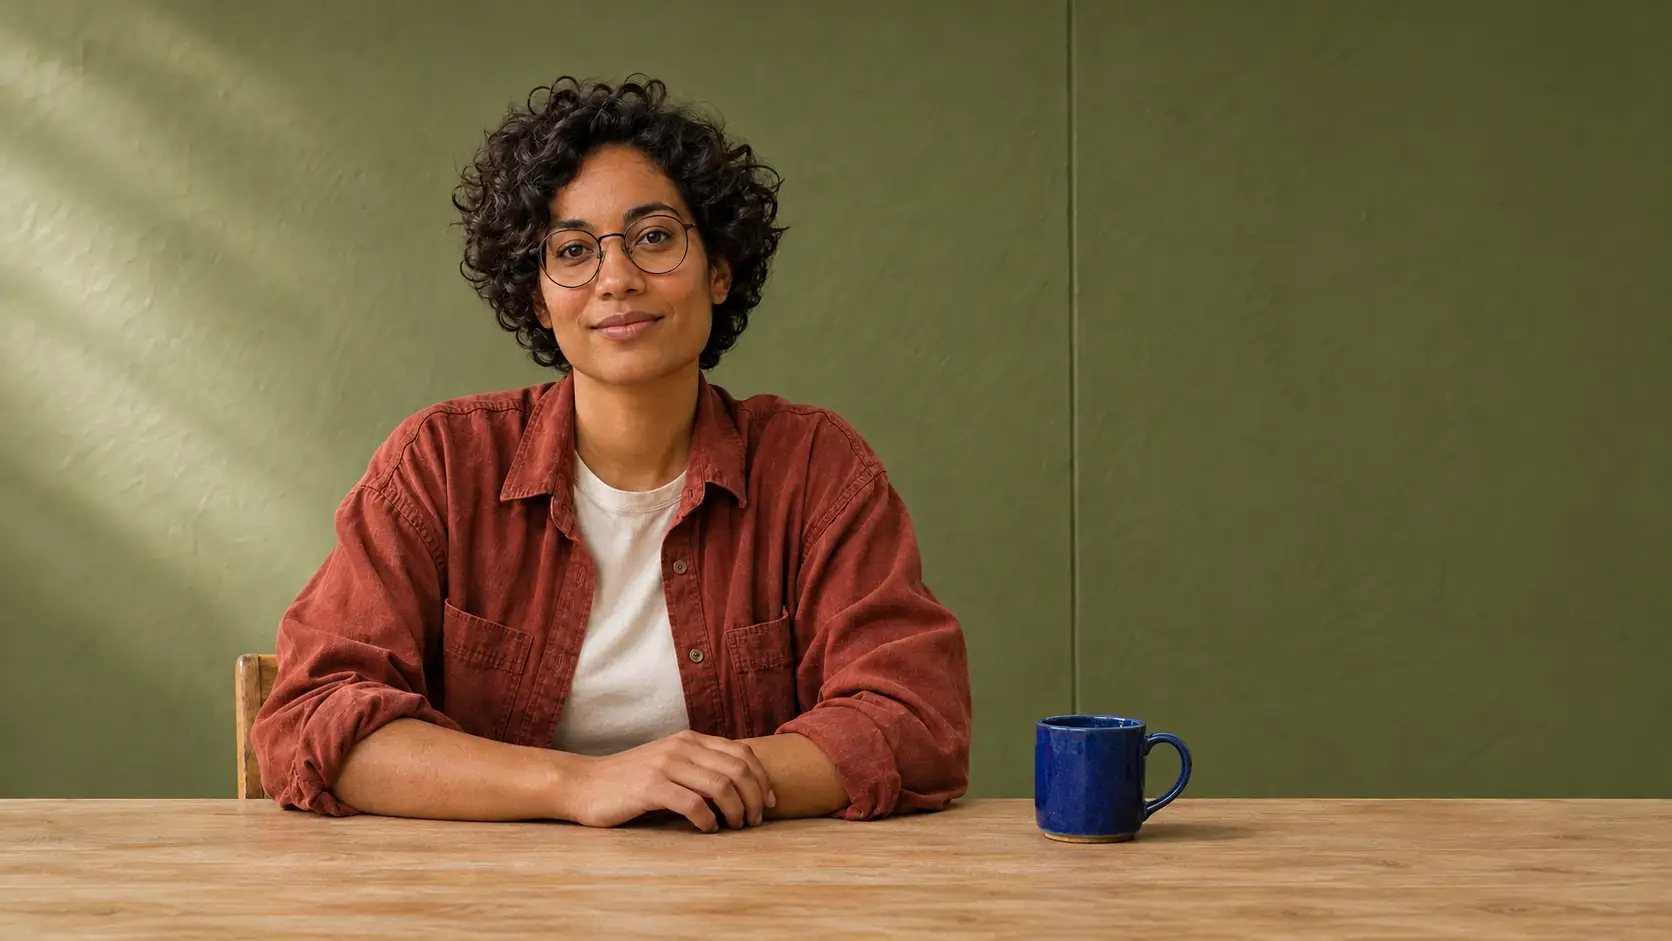
We ran three separate edits from the same AI-generated portrait. The curls, glasses, hands, table edge and blue mug gave us landmarks to compare. Start each new experiment with the original so that a mistake in one version doesn't carry into the next.
Choose the smallest edit that solves the problem
Upload a photo you own or have permission to edit, then describe one change. If you're using the ChatGPT Images editor, you can describe the area in words or use Select where available. OpenAI cautions that an edit can extend beyond the area you highlight. Keep a separate original and compare the result at full size.
- Replace the background when the entire setting is the distraction. Decide whether the foreground and its lighting should stay as they are.
- Remove one object when you like the setting and only need to clear a local distraction. Include the object's shadow or reflection if it should disappear too.
- Expand the canvas when you need more breathing room or space for a title. Specify which edges need room and how much the main subject can move or shrink.
1. Replace the wall behind the portrait
We asked for a muted blue plaster wall with left-side daylight. Naming the glasses, hair, hands, shirt, table and mug gave us a way to judge the foreground instead of judging the background color alone. Ask for a backdrop that makes sense with the existing light: a sunset scene behind someone lit by cool window light may need a separate relighting pass.
Original synthetic portrait
This fictional portrait was the exact reference attached for each of the three independent edits.
Background replaced — AI edit
The wall turned dusty blue and the crop, glasses, hands and mug remained close to the original. Fine wall and clothing textures still changed. Check hair edges and glasses at full size.
The wall changed from olive to dusty blue. The crop, glasses, hand placement and mug stayed close to the original. The two versions still differ in fine texture around the wall and clothing. When your source has loose hair or transparent frames, zoom in where they meet the background; a good thumbnail can hide a rough edge. Use the portrait background replacement prompt to set your own backdrop, foreground anchors and light direction.
2. Remove the mug without rebuilding the scene
We named the mug, handle and contact shadow, then described what belonged in the gap: oak below the table edge and olive plaster above it. If your target sits against a repeating pattern, name the pattern and where its lines should continue. If it blocks a hand or important lettering, the edit has to invent what the camera couldn't see.
Original synthetic portrait
This fictional portrait was the exact reference attached for each of the three independent edits.
Blue mug removed — AI edit
The mug, handle and contact shadow disappeared, and the table edge remained coherent. Grain and wall texture in the patch are synthesized; they do not reveal what the camera captured behind the mug.
The blue mug and its shadow are gone. The wall meets the back edge of the table in a straight line across the gap. Look just below that edge: the grain is synthesized, even where the patch looks plausible. A small distraction on a plain surface is a good starting case for the object removal prompt. Keep the original for any image meant to document what was actually there.
3. Widen the portrait and compare subject size
For a wide header we asked for a roughly 16:9 frame with extra room on the right. We described how the wall and table should continue and asked to keep the subject and mug at their original relative scale. Check the downloaded dimensions, then compare how much of the frame the person occupies. Both affect whether the image will work in your layout.
Original synthetic portrait
This fictional portrait was the exact reference attached for each of the three independent edits.
Canvas expanded — AI edit
The output is close to 16:9 and adds room on the right, but it also adds headroom and makes the subject smaller in the frame. The original pixels were not locked. Use a separately protected source layer if exact preservation matters.
The 1672 × 941 result is close to 16:9 and has useful space on the right. It also has extra headroom and a smaller subject in the frame. Treat it as a wider reconstruction: the canvas expansion prompt didn't lock the original pixels. If a client-approved image must stay intact, keep it as a separate layer on a larger canvas and work on the added area. Adobe's Generative Expand guide explains a canvas-first alternative; verify the protected layer before delivery.
How to ask for the other seven common edits
The suggestions below are starting instructions, not additional tests on this portrait. The linked detail and lighting prompts have their own examples.
- Retouch a portrait: Name one temporary blemish or distraction and keep pores, facial shape and expression. For a whole-image exposure adjustment, try a conventional slider first.
- Improve clarity: Name a feature that already exists, such as the stitching on a cuff, and ask for restrained contrast or texture there. Our image detail refinement prompt includes separate examples. Sharper-looking detail can be invented.
- Change an outfit: Specify one garment, its fabric and fit. Preserve the pose and hands and check sleeve openings, closures and any accessories the model might add.
- Change the time of day: Say where the new light comes from and what should happen to reflections and shadows. See the photo relighting prompt for golden-hour and blue-hour examples.
- Fix a blink: If you have another frame of the same person with their eyes open, use it as a reference or use that frame instead. For a generative edit, keep gaze and expression specified and check eyelids, pupils and catchlights.
- Soften clothing wrinkles: Point to the distracting crease rather than smoothing the whole garment. Keep seam lines, texture and natural folds around bent joints.
- Grade color: Name the target, such as cooler shadows with skin tones held steady. Use a conventional color editor if you need repeatable settings across a series.
When an edit misses, restart with the original and narrow the request. Compare the face or key object first, then scan edges, shadows and repeated details. Export only after checking the output at the size and crop where it will appear.
Editorial disclosure: AI tools assisted with drafting and editing this guide. The portrait is synthetic, and each displayed result was generated by editing that exact reference. No real person or event is depicted.
Sources
- Images in ChatGPT — OpenAI
- Generative Expand — Adobe